Description
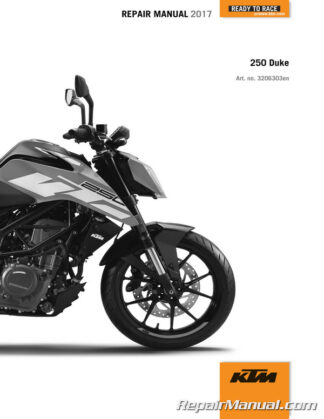
This 354 page, 2017 KTM 250 Duke Motorcycle Repair Manual – Paper Edition provides you with service, repair and maintenance information for your 2017 KTM 250 Duke Motorcycle.
Table of Contents
Symbols used
Formats used
Safety advice
Degrees of risk and symbols
Work rules
IMPORTANT NOTES
Manufacturer and implied warranty
Fuel, auxiliary substances
Spare parts, accessories
Figures
SERIAL NUMBERS
Vehicle identification number
Type label
Key number
Engine number
MOTORCYCLE
Raising the motorcycle with rear lifting gear
Removing the rear of the motorcycle from the lifting gear
Lifting the motorcycle with the front lifting gear
Taking the motorcycle off the front lifting gear
Raising the motorcycle with the workstand
Removing the motorcycle from the work stand
Starting
Starting the motorcycle to make checks
FORK, TRIPLE CLAMP
Cleaning the dust boots of the forklegs
Removing the fork legs
Installing the fork legs
Disassembling the fork legs
Checking the fork legs
Assembling the fork legs
Removing the lower triple clamp
Installing the lower triple clamp
Checking steering head bearing Play
Adjusting the steering head bearing Play
Changing the steering head bearing
HANDLEBAR, CONTROLS
Checking the clutch lever play
Adjusting play in the clutch lever
Changing the throttle grip
FRAME
Changing the footrest bracket
Checking the frame
SHOCK ABSORBER, LINK FORK
Measuring the rear wheel dimension unloaded
Checking the static sag of the shock absorber
Adjusting the spring preload of the shock absorber
Checking the joint for play
Removing the shock absorber
Installing the shock absorber
Removing the spring
Installing the spring
Checking the link fork
Removing the link fork
Installing the link fork
Checking the fork bearing for play
Changing the link fork bearing
EXHAUST SYSTEM
Removing the exhaust system
Installing the exhaust system
Removing the main silencer
Installing the main silencer
AIR FILTER
Changing the air filter, cleaning the air filter box
FUEL TANK, SEAT, TRIM
Opening fuel tank filler cap
Closing the fuel tank filler cap
Removing the front rider’s seat
Mounting the front rider’s seat
Removing the passenger seat
Mounting the passenger seat
Removing the fuel tank cover
Installing the fuel tank cover
Removing the fuel tank
Installing the fuel tank
Removing the front spoiler
Fitting front spoiler
Removing front fender
Installing front fender
Checking the fuel pressure
Changing the fuel filter
Changing the fuel pump
WHEELS
Checking tire pressure
Checking the tire condition
Checking the brake discs
Front wheel
Removing the front wheel
Installing the front wheel
Changing the front brake disc
Changing the front wheel
bearing
Checking the wheel bearing for Play
Rear wheel
Removing the rear wheel
Installing the rear wheel
Changing the rear brake disc
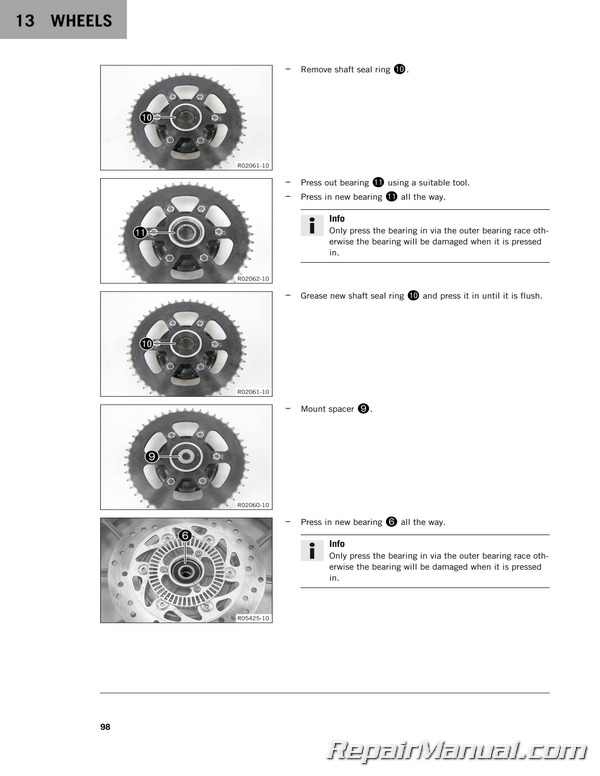
Changing the rear wheel bearing
Checking the chain tension
Adjusting the chain tension
Checking the chain, rear
sprocket, and engine sprocket
Cleaning the chain
Checking the rear hub damping
rubber pieces
Opening the chain
Riveting the chain
Changing the drivetrain kit
WIRING HARNESS, BATTERY
Removing the 12-V battery
Installing the 12-V battery
Disconnecting the negative cable of the 12-V battery
Connecting the negative cable of the 12-V battery
Charging the 12-V battery
Checking the charging voltage
Checking the open-circuit current
Changing the fuses of individual power consumers
Changing the ABS fuses
BRAKE SYSTEM
Checking the front brake linings
Changing the front brake linings
Checking the front brake fluidlevel
Adding the front brake fluid
Changing the front brake fluid
Checking the rear brake linings
Changing the rear brake linings
Checking the free travel of footbrake lever
Adjusting the free travel of the foot brake lever
Checking the rear brake fluid
level
Adding rear brake fluid
Changing the rear brake fluid
COMBINATION INSTRUMENT
Combination instrument
Activation and test
Day-Night mode
Warnings
Indicator lamps
Display
Speed
Shift warning light
Speed
ODO display
Coolant temperature indicator
Fuel level display
Time
Favorites display
Quick Selector display
Quick Selector display
Menu
KTM MY RIDE (optional)
Info
Motorcycle
Settings
Preferences
Pairing (optional)
Phone (optional)
Headset (optional)
Audio (optional)
Telephony (optional)
General Info
Trip
Warning
ABS
Favorites
Quick Selector
Bluetooth (optional)
Shift Light
Setting the time and date
DRL
Distance
Temperature
Fuel Cons
Language
Service
Extra Functions
Setting the service interval display
LIGHTING SYSTEM, INSTRUMENTS
Daytime running light (DRL)
Checking the headlight setting
Adjusting the headlight range
ENGINE
Removing the engine
Installing the engine
Engine disassembly preparations
Draining the engine oil
Removing the chain securing guide
Removing the valve cover
Removing the spark plug
Removing the clutch cover
Positioning the engine at ignition top dead center
Removing the timing chain tensioner
Removing the camshaft
Removing the cylinder head
Removing the piston
Removing the starter motor
Removing the timing chain
Removing the water pump wheel
Removing the alternator cover rotor, removing
Removing the starter drive
Removing the drive gear wheel of the balancer shaft
Removing the gear position sensor
Removing the suction pump
Removing the clutch basket
Removing the primary gear wheel
Removing the force pump
Removing the shift shaft
Removing the shift drum locating
Removing the locking lever
Removing the oil filter
Removing the left engine case
Removing the shift rails
Removing the shift drum
Removing the shift forks
Removing the transmission shafts
Removing the balancer shaft
Removing the crankshaft
Working on individual parts
Working on the left section of the engine case
Working on the right section of the engine case
Changing the shaft seal ring of the water pump
Checking the radial clearance of lower conrod bearing
Changing the conrod bearing
Changing the balancer shaft bearing
Work on the cylinder head
Checking the cylinder head
Checking the pivot points of the camshafts
Checking/measuring the cylinder
Checking the piston ring end gap
Checking/measuring the piston
Checking the piston/cylinder mounting clearance
Checking the oil pump
Checking the oil pressure control valve
Checking the clutch
Checking the shift mechanism
Preassembling the shift shaft
Disassembling the main shaft
Disassembling the countershaft
Checking the transmission
Assembling the main shaft
Assembling the countershaft
Checking the timing assembly
Changing the stator
Checking the electric starter drive freewheel, checking
Engine assembly
Installing the crankshaft
Installing the balancer shaft
Installing the transmission shafts
Installing the shift forks
Installing the shift drum
Installing the shift rails
Installing the left engine case
Installing the oil filter
Installing the locking lever
Installing the shift drum
locating unit
Installing the shift shaft
Installing the oil pump
Installing the primary gear wheel
Installing the clutch basket
Installing the spacer
Installing the suction pump
Installing the gear position sensor
Installing the drive gear wheel of the balancer shaft
Installing the starter drive
Installing the rotor
alternator cover, installing
Installing the water pump cover
Installing the timing chain
Installing the starter motor
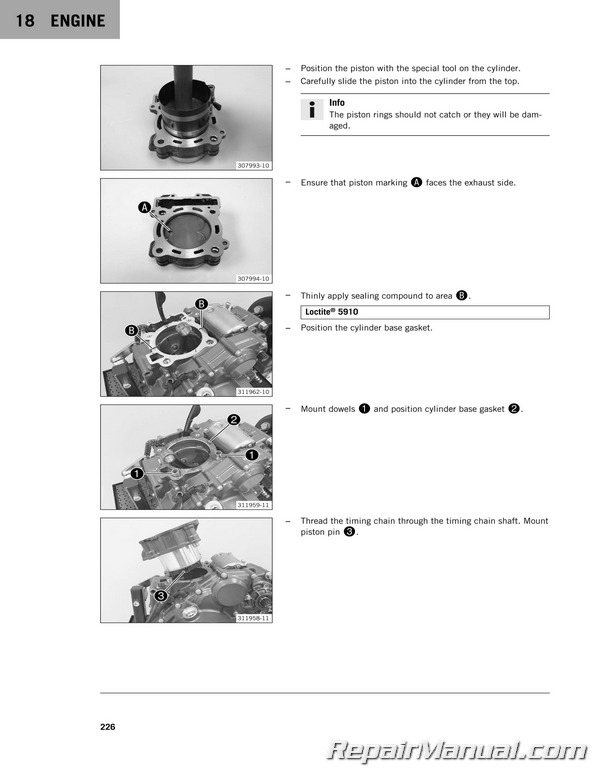
Installing the piston
Installing the cylinder head
Installing the camshafts
Installing the timing chain tensioner
Checking the valve clearance
Adjusting the valve clearance
Installing the clutch cover
Installing the spark plug
Installing the valve cover
Installing the chain securing guide
Installing the oil screen
engine, removing from the engine assembly stand
CLUTCH
Checking the clutch
SHIFT MECHANISM
Adjusting the shift lever
Programming the gear position sensor
WATER PUMP, COOLING SYSTEM
Draining the coolant
Filling/bleeding the cooling system
Checking the antifreeze and coolant level
Checking the coolant level
Changing the coolant
CYLINDER HEAD
Checking the valve clearance
Changing the spark plug
Adjusting the valve clearance
Removing the camshafts
Installing the camshafts
LUBRICATION SYSTEM :
Oil circuit
Checking the engine oil level
Checking the oil pressure :
Changing the engine oil and oil filter, cleaning the oil screens
Adding engine oil
IGNITION SYSTEM
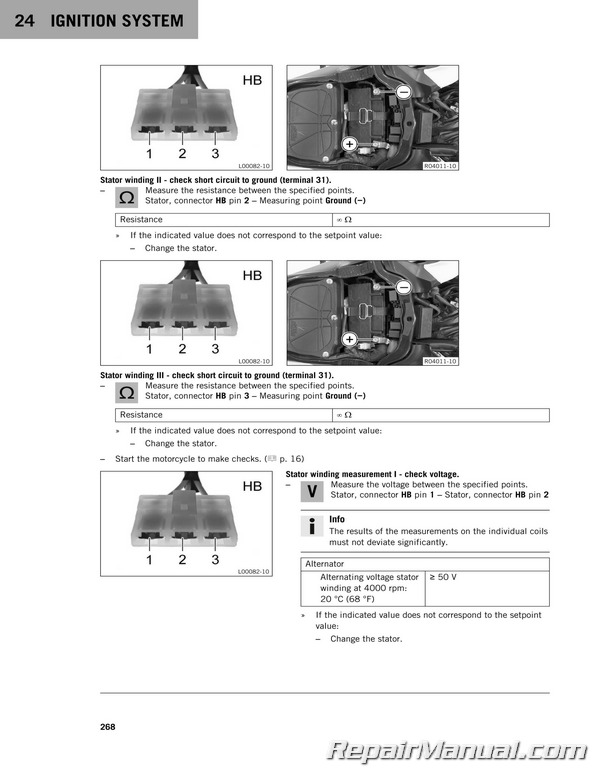
Alternator – checking the stator winding
Changing the spark plug
THROTTLE VALVE BODY
Resetting the service display using the KTM diagnostic tool
Performing the initialization run
TECHNICAL DATA
Engine
Tolerance, engine wear limits
Engine tightening torques
Capacities
Engine oil
Coolant
Fuel
Chassis
Electrical system
Diagnostics connector
Front ACC and ACC
Tires
Fork
Shock absorber
Chassis tightening torques
CLEANING/PROTECTIVE TREATMENT
Cleaning the motorcycle
Checks and maintenance steps for winter operation
STORAGE
Storage
Preparing for use after storage
SERVICE SCHEDULE
Additional information
Required work
Recommended work
WIRING DIAGRAM

